Seed saving is a centuries-old practice that allows gardeners and farmers to preserve and propagate the best plant varieties year after year. It involves the careful selection and harvesting of seeds from healthy and productive plants, ensuring the continuation of favorable traits. By saving seeds, gardeners can maintain biodiversity, adapt crops to local growing conditions, and even save money on buying new seeds each season.
Gathering and selecting seeds ensures the future abundance of gardens. When gathering seeds, it is important to select plants that are healthy, disease-free, and have produced high-quality fruits or flowers. By choosing the best plants for seed saving, the gardener can effectively preserve desirable traits and improve the overall resilience of future plant generations.
Not only does seed saving help to preserve rare and heirloom plant varieties, but it also ensures a continuous supply of affordable seeds for future plantings. By taking the time to gather and select seeds, gardeners become active participants in the preservation of traditional plants and the promotion of biodiversity. Seed saving not only saves money (you won’t have to buy seeds for that plant again if you save its seeds) but also allows for the selection of plants that are better suited to specific growing conditions.
Seed saving is a sustainable practice that connects today’s vegetable and flower gardens to their heritage while providing a tool to create abundance in gardens year after year.
Seed saving basics
Saving seeds from favorite plants–from especially good strains–can require some trial and error. In time you will learn which seeds are worth saving and which will probably bring disappointment. Here are the basics of seed saving:
Open-pollinated plants
Save seeds only from open-pollinated plants. Open-pollinated plants are often “heirlooms”, that is plants that have been passed down through generations. Plants that pollinate naturally without special manipulation are called open-pollinated. Open-pollinated plants produce true-to-type seeds–meaning their seedlings are like their parents. (Hybrid plants are produced by crossing two or more inbred varieties to obtain specific characteristics. Hybrid seeds commonly do not grow true to the parent.)
Open-pollinated plants are essentially identical genetically through natural selection and pollination. Open-pollinated varieties are the result of the repeated natural selection of superior plants from the same strain or variety.
Open-pollinated plants are those that have been naturally pollinated by insects, wind, or other natural means, resulting in a diverse gene pool. These seeds are true-to-type, meaning they will produce offspring that closely resemble the parent plant. You can save seeds from hybrid plants, but there is no guarantee the offspring will grow true to the parent. Hybrid plants are the product of cross-pollination between different varieties and may not reproduce true-to-type.
(Remember that plants can be either self-pollinated or cross-pollinated. Cross-pollination can occur naturally by insects or the wind–resulting in an open-pollinated plant–or by design and outside manipulation–human plant breeding, resulting in a hybrid. Open-pollinated plants that are not self-pollinating are susceptible to cross-pollination by a different strain or variety of the same species. This may produce plants with mixed traits not suitable for seed saving; this, for example, can happen if a pollinating bee carries the pollen of a different plant strain or variety to the plant it pollinates.)
Open-pollinated plants are best suited for seed saving. Seeds from hybrid plants commonly do not grow true-to-type. Hybrid plants are produced by selection, manipulation, and breeding of parent lines. While hybrids combine the best traits of their parents, the seed of hybrids usually reverts to the less desirable characteristics of the generations that came before.
Open-pollinated plants nearly always produce true-to-type seeds. Almost all open-pollinated plants are self-pollinating. A self-pollinating plant has male and female parts in the same flower or separate male and female flowers on the same plant. Self-pollinating plants commonly produce seed true-to-type because there is a very short distance for the pollen to travel to achieve pollination. Self-pollinating vegetables include beans, chicory, endive, lettuce, peas, and tomatoes.
Plants cross-pollinated by insects and the wind will produce true-to-type seed as long as the pollen comes from the same strain or variety of plant.
Hybrid plants
Do not collect seeds from hybrid plants. Hybrid plants are created by breeding (cross-pollinating) two varieties to create a third variety. The third variety or offspring will have a combination of traits from each “parent.” Seeds from hybrid plants do not grow true to the parent, rather the hybrid will draw random traits from the gene pool of the original parents. Hybrid seeds are denoted by “F1” on the seed packet.
Selecting plants for traits
Seed savers often save seeds from plants with traits they favor. If you have several tomatoes of the same variety and one tastes better than the others, save seeds from that plant to plant next season. If you want a tomato that is larger than other tomatoes, save seeds from the plant that produces the largest plants. Repeat the process year after year. If you want to grow tomatoes that are disease-resistant, save seeds from plants that have no disease. This process of natural selection repeated will give you plants with the traits you want.
Timing
Timing plays a vital role in seed saving. It is essential to allow the seeds to fully mature on the plant before collecting them. Depending on the plant, this may involve waiting until the fruits have ripened (tomatoes and peppers, for example), or until the seed pods have dried and begun to split open (beans and peas, for example). Patience is key in order to gather seeds at their peak quality.
Seed storage
Proper storage of gathered seeds is crucial to maintaining their viability. After collecting seeds, ensure they are fully dry before storing them in airtight containers, ideally in a cool and dark place. Additionally, labeling each container with the name of the plant and the date of collection will help you stay organized and make it easier to find specific seeds when needed.
Saving seeds from annuals, perennials, and biennials
The lifecycle of a plant–whether is an annual, perennial, or biennial will have a bearing on how you save seeds.
Annuals
Annual plants flower and produce seeds in the same season they are plants. Seed saving comes at the end of the growing season. Annuals include beans, broccoli if planted early, cucumbers, dill, eggplant, endive, fennel, lettuce melons, okra, onions, peas, peppers, pumpkins, radishes, soybeans, spinach, squash, and tomatoes.
Perennials
Perennials live for several seasons but flowers and seeds appear each year after the plant has reached maturity. Seeds from perennials can be harvested each year. Perennials include artichokes, asparagus, chives, rhubarb, sorrel, and watercress. Some perennials including Jerusalem artichoke, comfrey, and horseradish are propagated by root cuttings or plant division.
Biennial
Biennials produce an edible crop the year they are plants, but they do not flower and develop seeds until the second year. Biennials for seed production must be protected from winter cold so that hey can reach their second year of life. Many biennials will go to seed or “bolt” the first season if they are stressed. Some seed savers fool biennials into making seeds by planting them in midwinter or cold temperatures; this stress results in flowering and seed setting. Biennials include beets, brussels sprouts, cabbage, Chinese cabbage, caraway, carrots, celeriac, celery, collards, kale, kohlrabi, mustard, parsnips, winter radishes, rutabagas, salsify, and turnips.
Selecting and harvesting seeds
When it comes to selecting seeds for saving, it is crucial to choose plants that exhibit desirable characteristics such as vigor, disease resistance, taste, and productivity. These traits can vary depending on the type of plant, so it is important to have a clear understanding of the specific requirements and qualities of each variety. Look for plants that have shown resilience in your particular climate and soil conditions, as well as those that have consistently produced high-quality fruits or vegetables.
Harvesting seeds at the right time is essential to ensure their viability and success. Most seeds should be collected when they have reached full maturity and are beginning to dry out. For example, vegetables like tomatoes and peppers should be left on the vine until they turn fully ripe and start to wrinkle and shrivel slightly. At this stage, the seeds are generally fully developed and ready for extraction. It is crucial to collect seeds from healthy and disease-free plants to prevent the spread of any potential pathogens to future generations.
Seeds that are harvested too early may not be viable, and those that are overripe may have already begun to germinate. It is important to keep a close eye on your plants, observing them as they transition from flowers to seeds and waiting until the seeds start to dry out and turn brown.
Clean and prepare seeds
Successful seed saving requires proper cleaning and preparation techniques to ensure the viability and longevity of the seeds. Once seeds have been harvested, they should be properly processed and stored to maintain their quality and viability. This involves separating the seeds from their surrounding pulp, cleaning them, and drying them thoroughly. The seeds should then be stored in a cool, dry place away from sunlight and extreme temperature fluctuations. Some gardeners use envelopes, glass jars, or airtight containers to store their seeds, making sure to label them with the plant name and date of collection for future reference.
The first step in seed saving is to properly clean the seeds. This involves removing any debris, moisture, or other contaminants that could hinder the seeds’ germination and storage. To clean the seeds, start by separating them from the plant material. This can be done by shaking the dried stems, pods, or fruit over a clean and dry surface. Next, gently blow or fan away any lightweight chaff or dust from the seeds. For those seeds that are a bit more stubborn to clean, you can also use a fine mesh sieve or screen to separate the seeds from any remaining plant debris.
Threshing, screening, and winnowing
Ways to clean seeds include threshing, screening, and winnowing. Tightly podded seeds are often threshed; a simple way to thresh podded seeds is to place them in a cloth bag and then whack the bag against a wall. Screening is used when seeds are mixed with garden debris such as leaves and twigs; place the lot on a screen or wire mesh that will allow the seeds to fall through the holes. Winnowing is a method of swirling a mixture of debris and seeds so that the heavy seeds move away from lighter or bulkier chaff.
Wet processing seeds
Wet processing is the method used for seeds embedded in wet flesh fruits such as melons, tomatoes, and cucumbers. To wet process seeds, remove the seeds from the fruit; you may have to squeeze them. Wash the seeds to separate the pulp from the seeds. Sometimes the seeds may need to soak in water before the pulp and gel will fall away (seed savers call this fermentation; fermentation occurs naturally if fruit are allowed to fall to the ground and rot). Nonviable, hollow seeds will float to the top. The viable seeds will settle to the bottom. Clean the seeds with fresh water and then dry them before storing them.
Dry processing
Dry processing occurs when seeds are arrested from pods or husks that have dried on the plant. Beans, peas, okra, brassicas, lettuce, radish, carrots, and corn are dry processed. The mature plant can be harvested and hung upside down to allow sees to continue to mature and dry. Some seeds may need threshing or a vigorous shake–that process breaks the seeds free from their coverings.
Drying seeds
Once the seeds are clean, it’s important to ensure they are completely dry before storing them. Moisture in seeds can lead to mold growth and premature germination, rendering them useless for future growth. Lay the cleaned seeds in a single layer on a clean and dry surface, such as a paper towel or newspaper, and allow them to air dry for several days. Make sure to place them in a well-ventilated area away from direct sunlight or excessive heat, as these can also affect the seed’s viability. Drying and storing seeds is an essential step in the seed-saving process, as it prevents mold, disease, and decay.
For wet-natured seeds, air drying is recommended, but it is important to avoid direct sunlight, as this can damage the seeds. For larger seeds, laying them out on newspaper or a clean cloth in a warm, dry location is sufficient. For smaller seeds, using a paper bag or an envelope with good air circulation will do the trick.
Winnowing is the process of separating the debris and chaff from the seeds. A small fan can be used to help separate chaff from seeds.
Storing seeds
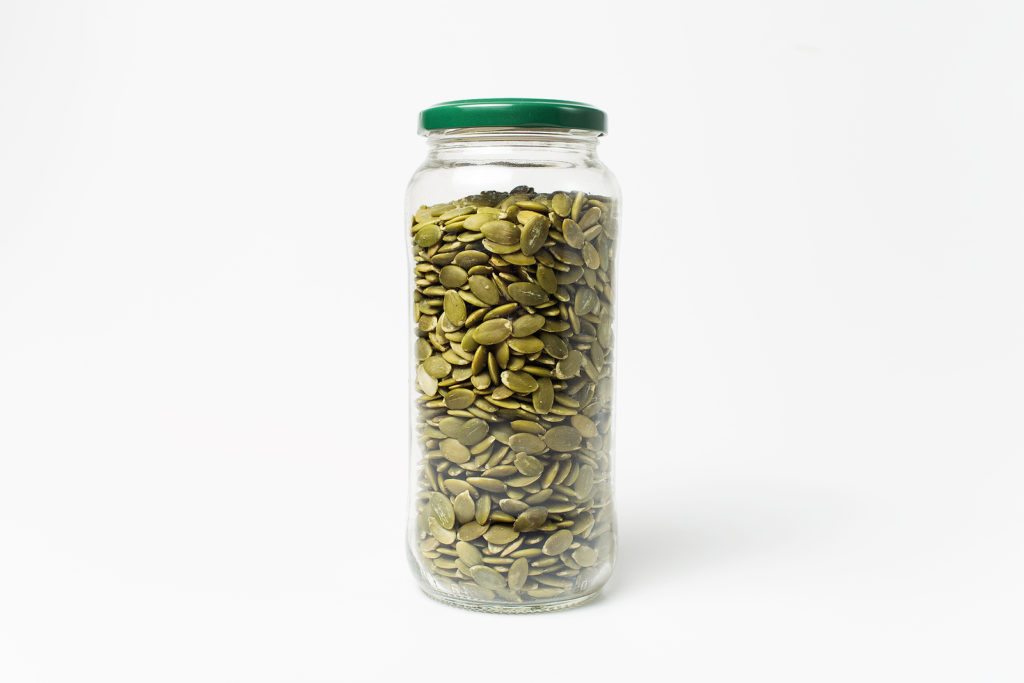
After the seeds have dried completely, they can be prepared for long-term storage. Proper storage conditions are crucial to maintaining seed viability. It is recommended to store seeds in airtight containers, such as glass jars or sealed plastic bags, to protect them from moisture, insects, and other potential threats.
Store seeds in a cool, dark, and dry place to maintain their long-term viability. The ideal storage temperature is around 40°F to 50°F (4°C to 10°C), with a humidity level of 30-40 percent Airtight containers or glass jars with tight-fitting lids are suitable for storing seeds, as they prevent moisture and air from reaching the seeds, which can cause them to deteriorate quickly.
Adding a desiccant packet to the storage container can help absorb any remaining moisture and further prolong the seeds’ lifespan. Be sure to label each container with the seed variety, as well as the date it was collected, to keep track of their freshness.
Labeling the containers with the seed variety and the date of harvest will help you keep track of your collection. When it comes to labeling seeds, there are a few key details that should be recorded. First and foremost, the name of the plant variety should be clearly noted. This is crucial to avoid confusion, especially if you are saving seeds from multiple species or varieties. Additionally, it is helpful to include the date of collection, as this allows you to track the freshness and viability of the seeds over time. Other important details to record include any specific growing conditions or characteristics of the plants, such as whether they are drought-tolerant or disease-resistant. Additionally, tracking the performance of specific varieties can offer valuable insights into their adaptability and suitability for different growing conditions.
Keeping track of seeds involves creating a system that allows for easy organization and retrieval. One popular method is to use seed packets or envelopes, which can be labeled with all the relevant information mentioned above. These packets can then be stored in a cool, dry location that is protected from light and pests. For those with larger seed collections, using a seed catalog or database can be useful. This allows for digital record-keeping, making it easier to search and sort seeds based on different criteria.
Best containers for storing seeds
- Metal cans with tight-fitting metal lids.
- Metal tins or boxes with tight-fitting lids
- Screw-top glass jars such as canning lids, baby food jars, peanut butter jars; bottles with rubber gaskets.
- Plastic containers with tight-fitting lids.
- Food-grade plastic buckets with gasketed lids.
- Plastic bottles with tight-fitting lids.
Saving seeds step-by-step guide
- Save seed from the best open-pollinated plants in your garden; the plants that have the best characteristics of the variety you want to grow, that are healthy, vigorous, and yield well. Do not save seed from diseased plants or plants that have set seed prematurely as the result of weather stress.
- Grow one vegetable cultivar at a time if you intend to save seed. That way there will be no risk of cross-pollination.
- Remove from the garden plants that are not true-to-type before they flower–this culling process is called “rouging out.” This ensures inferior plants will not cross-pollinate with plants you want to grow on.
- Do not grow differing cultivars of the same plant next to each other. This could result in unintended cross-pollination. (Cabbage, corn, pumpkin, and squash are plant families that easily cross-pollinate.) Keeping true-to-type is important when saving seeds.
- Do not save from F1 hybrids (human-manipulated and bred plants); they will not breed true-to-type.
- To avoid unintended cross-pollination of different plants from the same genus, isolate the variety from which you intend to save seed. Grow that variety in a greenhouse or poly-tunnel or at least 200 feet or more from other varieties of the same genus. The distance pollen can travel varies from plant to plant. Fences and hedges can cut down on the risk of cross-pollination.
- Mark the plants you are growing for seed saving with a stake; you don’t want to harvest these plants by mistake.
- Keep plants well watered until seed heads form following flowering. When seed heads form stop watering and allow seed pods to turn from green to yellow to brown.
- Stake or tie plants as necessary to keep seed pods from falling on the ground and becoming soiled.
- Allow seed pods to dry naturally on the plant, but before dried pods burst or are spoiled by rain or eaten by birds or pests cut them from the plant and place them in a cool, dry place where they can burst naturally or be opened and the seed saved. Hang plants upside down to dry completely. Place a newspaper beneath to catch the falling seed. If you can not cut seed heads from the plant cover the seed heads or pods with a bag to catch the ripened seed. Seeds from fleshy fruits such as tomatoes, squash, and cucumbers should be saved from fruits that are allowed to get a little overripe on the plant before harvesting but before they begin to rot.
- When the pods are brittle and dry, shake out the seed onto the newspaper to dry. Be sure to write the name of the plant cultivar on the paper catching the seed.
- Store dry seeds in paper envelopes or jars in a cool, dry place. Be sure to label the seed storage containers.
- Separate the seed from the flesh and wash the seed in clean water before drying, e.g. cantaloupe, squash, and cucumber
- If the seed has a jelly coating–such as tomatoes, remove as much of the flesh and jelly coating as possible by letting the seed sit in a jar of water for a few days. The seed will sink to the bottom and the jelly pulp will float to the top. Pour off the pulp and dry the seeds.
- Plants for seed saving need dry weather to ensure the seed heads and pods develop disease-free. If the weather in your region is wet during seed-saving time, it may be better to buy quality seed.
How to ensure pure seeds
Open-pollinated plants growing in the same garden can be subject to cross-pollination. Cross-pollination between different varieties can comprise the purity of seeds. Cross-pollination can more easily occur in the home garden than in commercial growing situations.
Cross-pollination can occur when the flowers of two different varieties are in bloom at the same time. If an insect or the wind carries the pollen of one variety to the flower of a different variety, cross-pollination is likely. If two varieties are growing in close proximity and flower at the same time, the chance of cross-pollination is good.
There are three ways to ensure seed purity: (1) distance between plants, (2) time isolation, and (3) mechanical isolation. Isolation means growing a crop away from any other crop that could result in cross-pollination.
Distance isolation
Distance isolation means growing crops that can cross-pollinate at a range of 800 feet to a mile or more apart. This is nearly impossible in a home garden. Barriers such as a wall or hedge between crops that may cross-pollinate is one way to “increase” distance. Barriers may not stop pollination by insects or wind.
Time isolation
Time isolation is more doable in the home garden. Simply grow one variety at a time. Time isolation can be accomplished by planting crops that can cross-pollinate so that they mature at different times. Plant the earliest-maturing crop first; the first crops should flower and set seeds before the second crop begins to flower.
Mechanical isolation
Mechanical isolation is a technique easily employed by home gardeners. Mechanical isolation involves bagging or caging plants. A bag or cover is placed over a plant’s flowers to prevent cross-pollination by insects or wind. Bags of lightweight fabric such as spun polyester cloth can be secured tightly around the plant’s stem. The bag is left in place until the plant forms an immature fruit or seed. “Caging” is the term used for “bagging” the entire plant rather than just the flowers.
How to handle seed-borne diseases and insect eggs
Most plant diseases are not seed-borne but if you suspect that seeds have been exposed to disease, you can treat them to prevent seed transmission. (It is best not to save seeds you suspect may bear disease).
Here’s how to clean seeds you suspect are diseases or infested with insect eggs:
- Wash the seeds in plain water before drying.
- Soak the seeds in salt water before drying.
- Steep the seeds in hot water with a temperature of 122°F (not hotter) for 15 minutes before drying.
- Ferment the seeds (do this for seeds surrounded by pulp such as tomatoes) for a few days, Fungi produced during fermentation produce antibiotics that control bacteria. Place the pulp containing seed in a bowl and cover it with water; let it set for several days. After several days, the good seed will sink to the bottom the top can be poured away.
Why save seeds?
- Seed saving means you will always have your favorite variety.
- Seed saving saves money. You won’t have to buy the seeds for your favorite varieties each year.
- Seed savers like to trade seeds. Seeds of many vegetable varieties are not available commercially. You can trade with other seed savers for varieties you would like to grow that are available commercially.

Vegetable seed-saving tips crop-by-crop
Here you’ll learn when and how to save seeds for many vegetables and how long the seeds will be viable.
Artichoke
Artichoke seeds mature 60 days after fertilization. Seeds mature when bracts turn from green to brown. Thresh seeds. Seeds are viable for 6 years.
Arugula
Dry the arugula silque on the plant or harvest the plant and hang them upside down to dry. Thresh to process. Seeds are viable for 6 years.
Asparagus
Let asparagus berries dry on the plant then harvest them before the frost. Asparagus seeds are viable for 3 years.
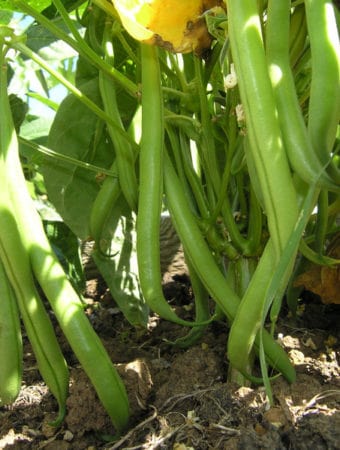
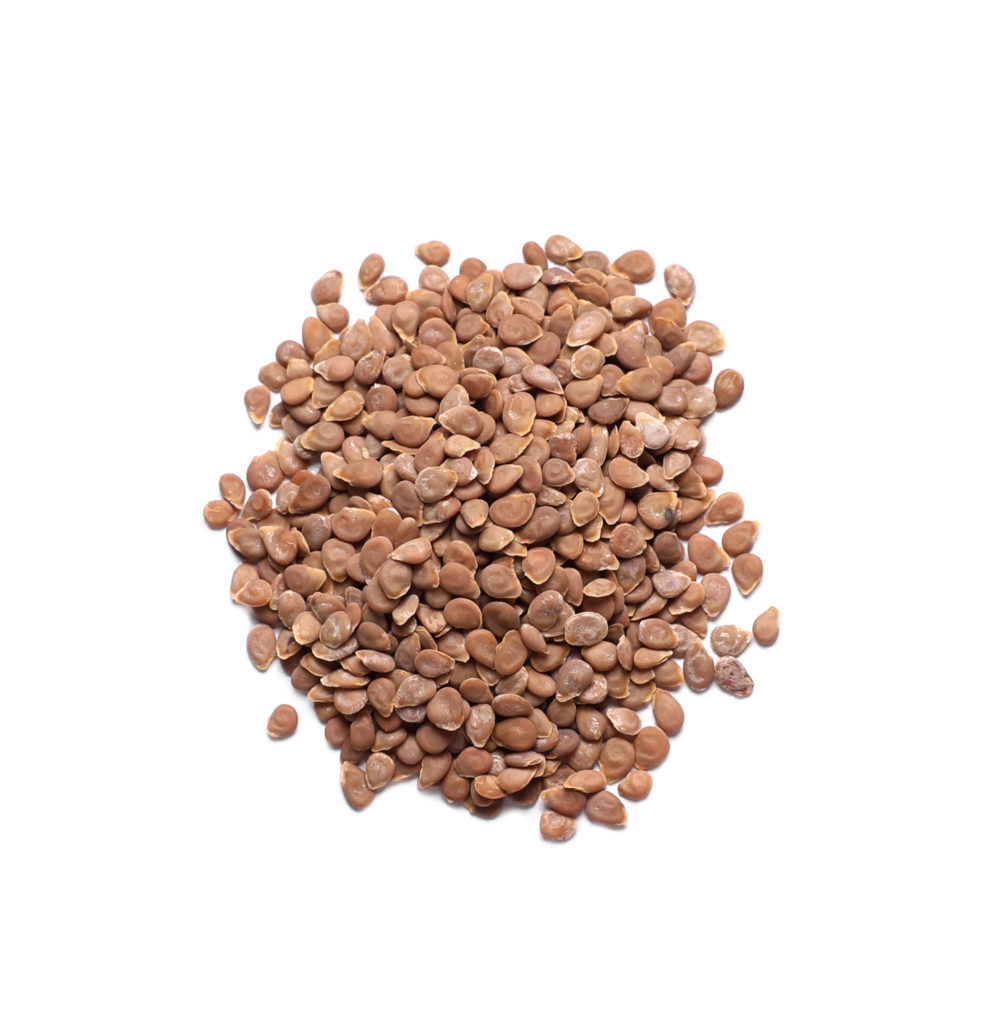
Beans
Dry bean pods on the plant or allow plants to dry fully if harvested after frost. Flail the pods gently. Seeds are viable for 3 to 4 years.
Beets
Beets are a biennial; seeds mature the second year. Beet seeds ripen first at the base of side shoots then progress to terminal points. Seeds change from green to brown; unripe seeds will be milky. Thresh the seeds. Beet seeds are viable for 5 years.
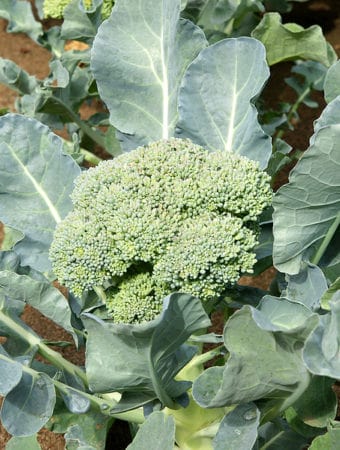
Brassicas
Brassicas include broccoli, brussels sprouts, cabbage, cauliflower, Chinese cabbage, collards, kale, kohlrabi, mustards, rutabaga, and turnips. Brassicas are biennials; seeds mature the second year when siliques turn from green to brown. Allow the seeds to dry on the plant then thresh. Seeds are viable for 5 to 7 years.
Cardoon
Cardoon seeds mature 60 days after fertilization. Seeds mature when bracts turn from green to brown. Thresh seeds. Seeds are viable for 6 years.
Celery and celeriac
Celery and celeriac are biennials. Seeds mature the second year. Seeds produced the first year will not be viable. Harvest seeds when they turn from green to brown. Screen the seeds. Seeds are viable for 3 to 6 years.
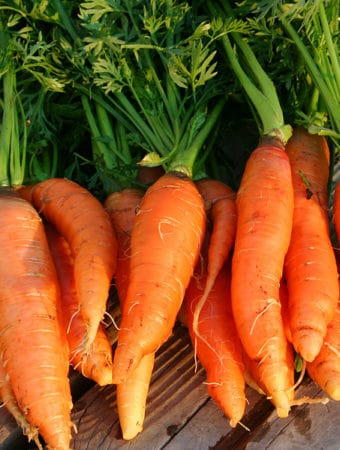
Carrot
Carrots are a biennial; harvest seeds the second year. Carrot seeds mature 4 to 6 weeks after pollination, umbellets turn brown when mature. Hang or place the umbels in a bag and flail. Seeds are viable for 6 years.
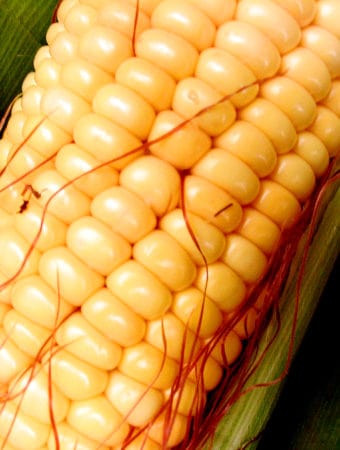
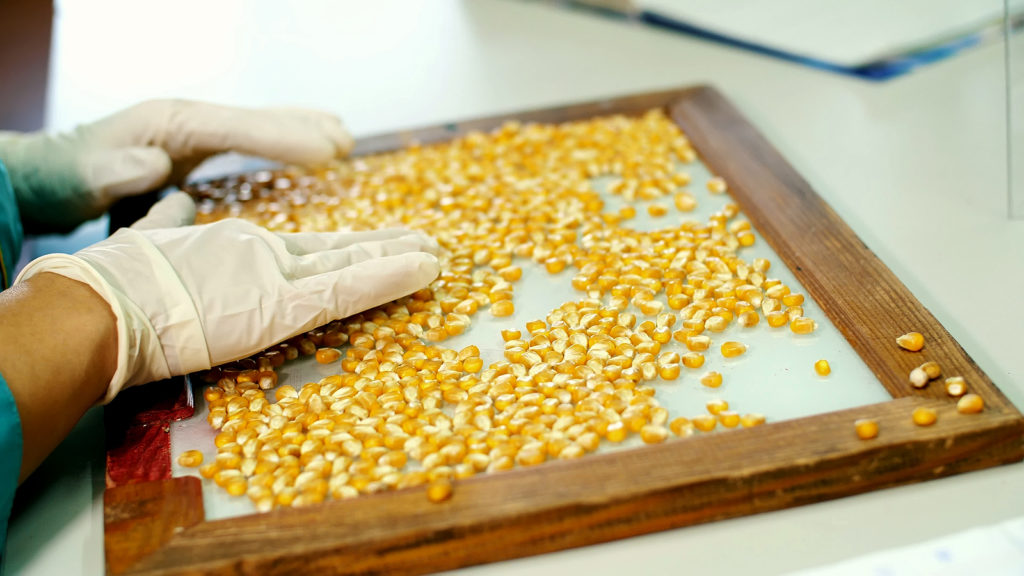
Corn
Corn seeds reach maturity when the husks are dry and brown and the kernels are hard. Hand-twist the ears to remove the kernels. Seeds are viable for 2 to 3 years.
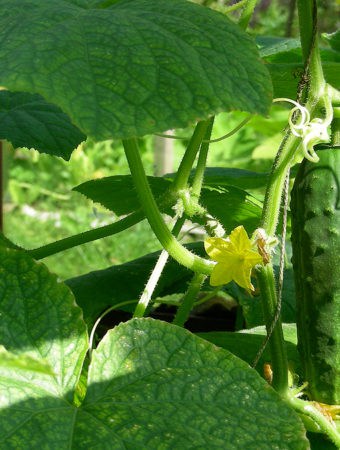
Cucumber
Harvest cucumber seeds five weeks after the fruit reaches edible maturity, when changes color to yellow or brown. Rinsed the seeds before saving. Seeds are viable for 5 years.
Eggplant
Harvest seeds after the fruit turns yellowish and dull. Wet process and rinse the seeds. Seeds are viable for 4 to 6 years.
Leek
Leeks are a biennial; save seeds the second season. Allow flower heads to dry on the plant; harvest seeds when the flower heads (capsules) begin to split and the dark seeds become visible. Thresh the seeds. Leek seeds are viable for 2 to 3 years.
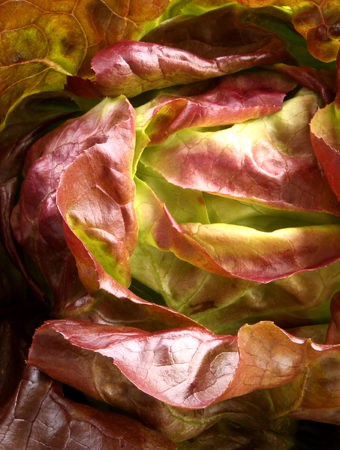
Lettuce
Allow lettuce plants to bolt. Seeds are mature when the pappuses appear. Screen the seeds to remove chaff. Seeds are viable for 6 years.
Melons
Harvest melon seeds when the fruit is ripe for eating. Rinse the seeds before saving. Seeds are viable for 5 years.
Onion
Onion is a biennial; save seeds the second season. Allow flower heads to dry on the plant; harvest seeds when the flower heads (capsules) begin to split and the dark seeds become visible. Thresh the seeds. Onion seeds are viable for 2 to 3 years.
Parsnip
Parsnip is a biennial; plants flower and set seed the second year. Parsnip seeds are mature when they change from green to tan. Thresh the seeds. Seeds are viable for 1 year.
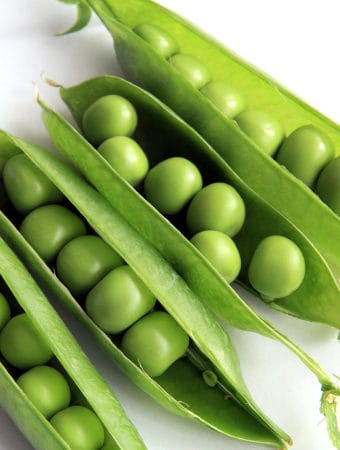
Pea
Dry pea pods on the plant. Hand-shell or thresh the pods. Seeds are viable for 3 to 4 years.
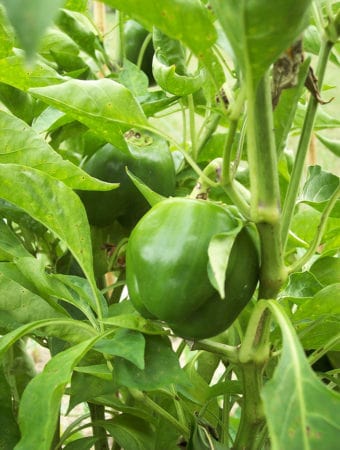
Peppers
Allow the fruit to ripen fully on the plant to its final color before harvesting seeds. Remove the seeds from the fruit and dry. Seeds are viable for 2 to 4 years.
Pumpkin
Harvest pumpkin seeds about 4 weeks after the fruit matures. Rinse the seeds. Seeds are viable for 4 years.
Radish
Harvest radish seeds after they reach edible maturity. Dry the pods on the plant. Thresh the seeds. Seeds are viable for 6 years.
Spinach
Harvest spinach seeds when plants turn yellow. Strip and winnow the seeds by hand. Seeds are viable for 3 years.
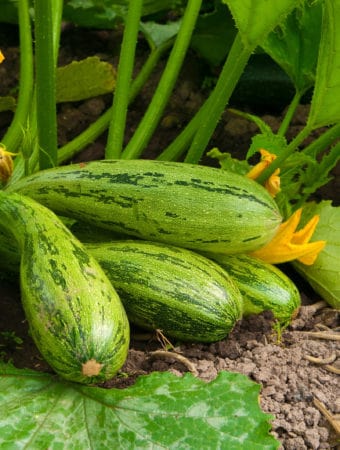
Summer squash
Harvest summer squash seeds about 4 weeks after the fruit matures. Rinse the seeds. Seeds are viable for 4 years.
Swiss chard
Swiss chard is a biennial; seeds mature the second year. Swiss chard seeds ripen first at the base of side shoots then progress to terminal points. Seeds change from green to brown; unripe seeds will be milky. Thresh the seeds. Swiss chard seeds are viable for 5 years.
Tomatillo
Harvest seeds when husks are at the edible stage and husks split. Wet process the seeds. Seeds are viable for 4 to 6 years.
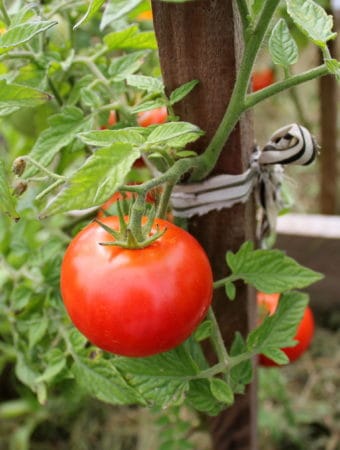
Tomato
Harvest tomato seeds after the fruit is ripe. Ferment the seeds for 1 to 3 days before drying. Seeds are viable for 4 to 8 years.
Watermelon
Save watermelon seeds when the fruit is ripe. Rinse and dry the seeds for one week. Seeds are viable for 5 years.
Winter squash
Harvest winter squash seeds about 4 weeks after the fruit matures. Rinse the seeds. Seeds are viable for 4 years.
Herb seed-saving tips crop-by-crop
Here you’ll learn when and how to save seeds for many culinary herbs and how long the seeds will be viable.
Basil
Harvest basil flower clusters when they are brown. Thresh to remove the seeds. Seeds are viable for 5 years.
Bee balm
Harvest flower heads when they are dry and brown. Thresh to remove the seeds. Seeds are viable for 2 years.
Borage
Harvest borage seed when the flowers fade and turn brown. Thresh to remove the seeds and then winnow. Seeds are viable for 3 to 5 years.
Chamomile
Let flowers dry on the plant then harvest the seeds. Collect dried head by hand then thresh to remove the seeds. Seeds are viable for 3 years.
Chervil
Dry chervil flower heads on the plant and allow seedheads to dry fully. Thresh the seeds. Seeds are viable for 1 year.
Chive
Harvest seeds when capsules split open to expose the mature seeds. Harvest flower heads and spread them on a screen to dry. Rub and thresh to remove the seeds. Seeds are viable for 2 years.
Cilantro/Coriander
Harvest seeds about 2 weeks after flowering. Place flower heads in bags and hand upside down to catch the seed as it dries. Seeds are viable for 2 to 4 years.
Dill
Dill seeds are mature when the flower head dry and brown. Hand harvest carefully and thresh the seeds. Seeds are viable for 5 years.
Fennel
Harvest fennel umbles when they turn brown. Flail to remove the seeds. Seeds are viable for 4 years.
Lemon balm
Harvest seeds when the flower heads brown and dry. Thresh to remove the seeds. Seeds are viable for 3 years.
Lemongrass
Dry lemongrass seedheads on plants; harvest before the first frost and continue drying indoors. Thresh to remove the seeds. Seeds are viable for 1 year.
Marjoram
Marjoram seeds can be harvested when the flower heads brown. Thresh to remove the seeds. Seeds are viable for 1 year.
Oregano
Oregano seeds can be harvested when the flower heads brown. Thresh to remove the seeds. Seeds are viable for 1 year.
Parsley
Allow parsley umbles to dry on the plant. Seeds are ripe when the flower heads turn brown. Thresh to remove the seeds. Seeds are viable for 2 to 3 years.
Rosemary
Remove rosemary flower heads when they turn brown. Thresh to remove the seeds. Seeds are viable for 1 year.
Sage
Allow sage flowers to dry on the plant. Harvest seeds when the flowers are brown and dry. Thresh to remove the seeds. Seeds are viable for 1 year.
Savory
Allow flower heads to dry on the plant. Thresh to remove the seeds. Seeds are viable for 3 years.
Sunflower
Harvest sunflower seeds when the flowers dry and the seeds are dark-colored. Hand the flowers upside down; thresh to remove the seeds. Seeds are viable for 2 to 3 years.
Thyme
Dry the flowers on the plant and continue to dry indoors. Harvest seeds when the flowers are brown and dry. Seeds are viable for 3 years.
Recommended articles: